ComfyUI Finds

Starting a new thread to share some learnings from the trenches of ComfyUI

Many of us have watched Doug Hogan’s course, and it has set a nice baseline on how to approach our workflows with ComfyUI. But it doesn’t have as clear roadmap of how you go beyond the course (and maybe combining a few lessons into a new workflow, like the clean plate workflow I came up with), but explore further directions.

Turns out RunComfy has a whole section of sample workflows: ComfyUI Workflows | Runnable Guaranteed with Pre-set Nodes & Models . Everything from Fashion Fitting (switching out garments), keeping a character consistent across multiple videos, lipsync, character turn-around, relighting, trajectory motion control, and more.

It takes one button to run these workflows on RunComfy, fully loaded. Or you can just them onto a medium machine, download the workflow .json and then put that on your local install and evolve it without the clock ticking on you. Of course you need to chase down various nodes and models. But that’s always the case. Their Discord also puts a message into their Announcement channel every time the add a new workflow.

One thing I discovered while playing with one of these locally after downloading it from RunComfy - the ability to use your LLMs inside your RunComfy workflow. That workflow came with an OpenAI node. But there are also Claude nodes available. You will need to get an API Key and link it to your existing ChatGPT/Claude account and it will incur some charges (but much less than paying for a whole machine).

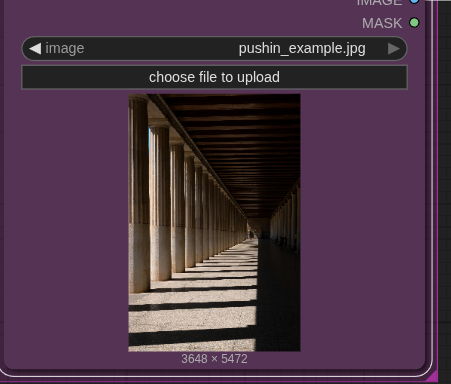
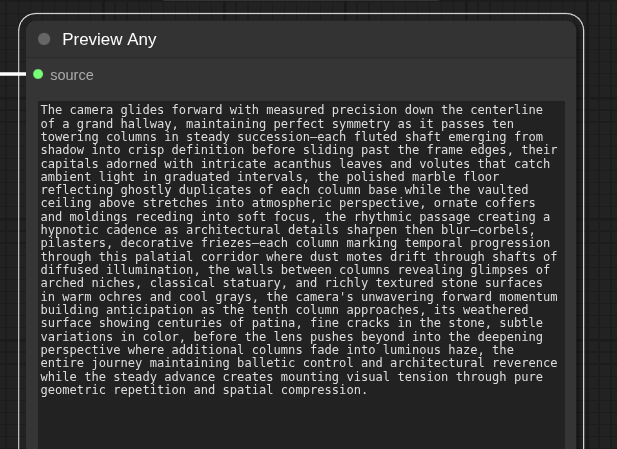
Claude (which I’m using) has a ‘describe image’ and ‘combine text’ node. So you don’t have to manually run your LLM to create prompts, but you can do that right as part of your node tree. Pipe the image into a describe node, then tweak the overall prompt, combine the two and you’re off to the races.

11 Likes

Love this. Thanks, Jan!

I use the pinokio appimage version and not .rpm, and I run comfyui on my flame workstation, pinokio is a docker and does not touch the flame libraries, for me it works very well

4 Likes

Thanks Jan!

Interesting experiment with the ‘push-in’ workflow from the RunComfy example workflows. Copied it local and messed around with it further.

Starting point (JPEG still image from Pexels):

Current result - not production ready, but could be cleaned up, also skipped the upscaling while playing around, but that’s easy.

It uses SD1.5 and a custom ‘push-in’ LORA to come up with the motion.

This was my specific prompt:

This gets combined with a larger image neutral instruction, both of which feed into Claude to generate the actual StableDiffusion prompt, that goes through still to video conversion, and right now a KSampler for 30 frames at 720p.

Took about 4 minutes to run, longer for a longer frame range.

It was interesting to see how the prompt made quite the difference in image creative direction. Without detail on speed, it was doing a mad-dash down the hallway. The count does seem to be honored. Interesting too that it actually animates the person as walking on the other all by its own. It doesn’t seem to understand the centerline part of the prompt though.

Happy to share the .json file for anyone interested. You would just have to add your own ClaudeAPI key or replace it with the ChatGPT node for the prompt generation.

Had to download 5 additional models and a few nodes. The push-in Lora is not on Comfy, but you can find it on HugginFace. And I had to hack the Claude prompt generator python code, since it was referencing and out-dated model and had to be pointed at the current Sonnet release.

This is the type of thing one could likely also do with Weavy, as it’s more focused on content generation. Would be interesting side-by-side if someone took that to Weavy to see what happens there and how easy it’s with it’s cleaner interface.

2 Likes

I had to do a tracking shot similar to this where it needed to track forwards but diagonally. It was really hard to get it to do it, it just wanted to track in straight. What I found was that if you give it something to track towards, it understands what to do.

So I thought what is something commonly used by AI that would be easily recognised in any lighting environment. Penguin was the answer. So now if I need it to track in in a particular direction I comp a small penguin in the distance and then prompt “Camera tracks in slowly towards the penguin” Then remove the penguin in post. Works really well.

If you wanna try it, here’s the penguin w alpha I now keep on hand for such uses:

Dropbox

9 Likes

I have just started to dabble in Comfy but, I have been wondering if it wouldn’t be easier to direct the camera move with a simple 3D scene. We’ve been doing it for 40 years in 3D programs after all and it would be way easier to direct a camera move in this way than try to do it with words, imho.

You could theoretically drop in an fbx file and use it as a control net for driving the motion.

Edit:

Reading more on this, and since ComfyUI operates in latent 2D image space, not 3D space, it has no built-in awareness of real 3D geometry, perspective, or camera movements. So an FBX file can’t directly “drive” the diffusion process unfortunately…

2 Likes

but you can render a playblast and use that as a input :slight_smile:

remeber when we had to push tracking data to different programs by slapping on trackmarkers then rendering it out and re-tracking in a different software? same idea

Yes, also figured that out. Use it as a Control net.

2 Likes

Exactly!

Though that is one of the challenges / journey elements of adapting AI. My mindset goes down exactly the path you mention (traditional procedural methods). And they have their place.

And then I force myself to have an open mind towards using prompts instead and see what works. Because that’s how our kids would naturally operate here, not bound by the ways of yesterday.

Ultimately you want to master both - know how Loras and control nets work so you can exert control when needed, but flex into expressing it via prompts when appropriate. It can be faster, and you may have additional options.

Once you have one of these workflows setup, you can execute it on other imagery in the span of minutes, simply replacing input and prompt. I’ve seen this on my clean plate setup. Procedural approaches are more time consuming.

So maybe you use the AI methods during pre-viz and even early stages of the shot while everything is being dialed in. And then if you don’t find enough precision, you switch to the precise methods as needed?

Interesting also what the actual prompt was.

There is the general process prompt, which is neutral to actual image, then you have your short image specific instructions, and you have the lora trigger. All that gets concatenated and fed into the Claude prompt generator for what actually goes to the model. Also right now I have my negative prompt empty, that could possibly be refined as well.

Note how an ‘image description’ generated by Claude has provided the model a lot of detail about what to generate. I would have never come up with this type of language, but it seems to go a long way to the end result being convincing.

The only prompt I have to adapt when using this on a different image is my short prompt, the rest is static or gets generated by AI.

General process prompt (came with the setup):

Generated prompt:

lora trigger:

1 Like

Very interesting still to 3D model, to geo tracked, texture generated workflow:

7 Likes

Gotta love keen tools

1 Like

From what I understand they’re a heartbeat away from developing a flame workflow.

7 Likes

Pixaroma on YouTube is really great. Goes from the very basics to more involved workflows, and shares all the files on his discord. Highly recommended.

1 Like

Well, now it’s a collectors item.

4 Likes