We’re super proud of these and hope they help you in your world.
We’ve got some more ideas and formats for the next round, and would love to hear any feedback you have. Are the videos helpful? What about length? Some are long, some are short. Do you have a preference? What subject matters interest you?
Don’t shoot me as I’m not 100% on the math, not even 50%, but a trick I use when taking rec709 into acescg is to go via st2084 inbetween. Bring it in as rec709 take it to st2084 with a CM, then using another CM go from st2084 to acescg. It’s the closest I’ve got to getting rec709 looking like rec709 in aces.
Love these little snippet clips btw
You’ve even convinced me to give Aces yet another go…although as most of what i do involves bring rec709 logos and graphics into the video world, then i can still foresee a world of hurt ahead.
Thanks for the kind words! I admittedly had a lot of help from some smart people at Autodesk over the last few years. Happy to share what I know with this fantastic community.
Hi @Jeff - been exploring Image node after seeing the tutorials and i do have a question…
you mentioned how using the green image node is great for doing work to the native file size prior to any resizes etc, and that makes a lot of sense, but one thing i have noticed on the first shot i’m trying it on is the need to do cleanup work on the background (paint or patch seam lines on a set wall).
To do this prior to Resize would be perfect, but i can’t see a way to do this kind of work in Image…do you know a way?
Hey there @Lightningad - great question. There IS a chance you can pull off that kind of shot in Image, and I have two ideas in mind, but there’s also a solid chance that this may be one of those scenarios that you have to escalate it to Batch or BFX to really pull it off. Image can do a lot—a whole lot, but it’s no replacement for batch. That being said, here are my two ideas:
I’ve had some luck using the beauty node a2 beauty on lines like that to get rid of them, but it’s hard to say without giving it a shot. Try that and mess with the settings a bit and see if you can get away with it. If the lines are feint and already hard to see then I think it would work great, but if there’s a lot of contrast and the lines are prominent then I think it might not work.
It is possible to use the Front Matte Offset matchbox shader in the image node to do offsets like this. I’ve used it before for situations just like this, but since you aren’t REALLY in a compositing environment, it’s a little tricky to get it to work perfectly. I think the circumstances have to be pretty ideal to be able to use it. As I mentioned, I HAVE used it before, but the stars really aligned and it was the perfect shot. In Image you aren’t able to use stuff like a Mux node to freeze a frame or use an offset frame. You also can’t paint your way out of anything since you don’t have access to Paint. But again, Front Matte Offset does work just like it does in Action to do cleanup work like you’re describing, but as soon as you need to dig deeper, you may have reached the full extent of what the Image node can offer you in those circumstances.
And as I also mentioned in the video, if you begin to go down the path of the Image node and you find that it isn’t quite working, you always have the option of saving the image node from the timeline and then loading it into Batch, which gives you access to all of the gmasks that you drew / tracked and you can copy and paste them into traditional gmask tracers to continue right where you left off.
Same here. I like doing my fixups and cleanups before grade so I use bfx. It’s a great workflow to keep BFX for comping and fixups and Image just for grade.
Thanks so much @Jeff, for the Image node tutorial. It’s when we push ourselves out of our comfort zones that we learn new stuff. Thanks for lending a hand here.
My muscle memory keeps pressing F3 to see the result of the selective but I guess muscles have to learn new tricks as well…
Quick question: Is there a way to reset just the Diamond keyer settings on the selective? I like my masks and master grade but need to do the key from scratch…
And the effort you put in there is amazing, you added some comments later as far as I understand, and sped things up for our convenience.
@Sinan! Thanks so much for the kind words. I really appreciate that coming from you, because from what I know about you–you rock! It makes me happy to hear that you’re getting something out of those tutorials.
To mirror what @hBomb42 said, the short answer is that the good ol’ Reset button on the bottom right does the trick to reset the keying parameters, but you do have to be a little careful. Here are a few long-winded tidbits about it because that’s how I like answering questions:
In my experience, when you haven’t explicitly clicked on anything in the schematic, and you’re just working as normal in the Image node / master grade, the default behavior of the reset button is to actually ONLY do what you’re asking it to do—reset the selective keyer for the selective you have selected. You could have adjusted a bunch of stuff on the MasterGgrade node and created several gmasks too, but hitting the reset button only resets the selective’s key. It’s working this way because from the schematic perspective, the reset button resets your currently selected item, and since the MasterGrade node is a separate item / node from the selective, it’s unaffected when you hit reset.
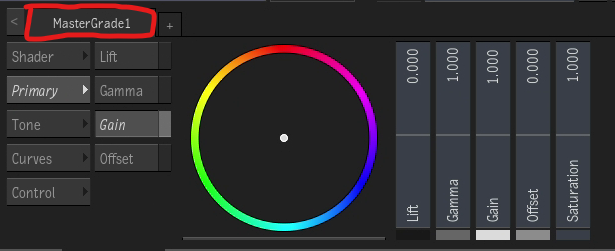
If you were to explicitly select the MasterGrade node from the schematic or click on this Mastergrade tab while you’re working
(which has the same effect of, under the hood, selecting the MasterGrade node) then hitting the reset button wouldn’t touch the selective keyer and would actually reset the MasterGrade node. I just wanted to mention that because it could be tempting to think of the reset button as always resetting your Selective keyer, but in reality it’s just a context sensitive reset button and only resets what you have selected.
As an interesting sidenote, there is a button on the Arc Tangent panel called Reset All and it actually resets the whole image node back to its default settings. I find it interesting that that button exists on the panel but not anywhere I can see in the UI. I think you can set it as a keyboard shortcut- an entry called Reset Node / Timeline FX but I’m not positive that it’s the same thing, but I digress!
Hope that answers the question and gives you some insight as to how it’s working and why it’s working that way.
Like I mentioned, some muscle memory is also what keeps me tied to a specific way of working. Now, clicking the right button for the contextual menu is something I should be exploring for other stuff as well maybe. In the schematic, if the whole branch is selected it might reset everything, but I need to check this tomorrow.
Paint and Roto. Sounds silly, but I’d love to see how other people make the small choices (softness in versus out, painted fill vs pixel spread, vs who cares)