@KuleshovEffect asked on discord if there was a way to take a pre-rendered UV pass and create procedural motion blur to apply to the render. I’m sure there are other ways but I thought I might post this here. It’s more about vector unwrapping then anything but I thought it might be good to have in the wild.
The idea of the batch setup is to procedurally create motion vectors from a rendered UV pass to facilitate the use of vector based motion blur in Flame’s Motion Blur node. The meat and potatoes of the concept is :
- Define the objects position in screen space using the objects alpha
- Unwrap the screen space based coordinate system of the object into UV space using a destination vector created from the supplied UV pass.
- Temporally shift the UV space positional data a frame before and a frame after the current frame in order to establish the vector and amplitude of motion traversed at the current frame.
- Transform the resultant UV space Motion Vectors back into screen space.
- Process motion blur using the screenspace Motion Vectors on the rendered source and alpha.

Off to the races
First things first. We need some moving rendered content with alpha. We also need a UV pass and we’ll generate some real motion vectors while we’re at it to test. We don’t really need the motion vectors out but they’re a nice indicator of if we’re doing things correctly or not. Everything here is being kept in half—I guess we could go full, but it’s just a pain with flame. This is all done in UHD, but it should work fine with other resolutions. I’ve tried to build that in from the get-go but I’m sure things will break hence the documentation.

Variable assignent
Here we have input mux nodes and the variable matchbox which I tried to link all of the important parameters into.
- Var01 = Xres of input
- Var02 = Yres of input
- Var03 = Pixels added to Vector unwrap
- Var04 = Motion Vector multiplier
- Var05 = MotionVector softening
- Var06 = MotionBlur shutter
- Var07 = MotionBlur samples
- Var08 = MotionBlur vector softening
In order for things to remain somewhat automatic, you need to enter the Xres and Yres of the incoming images so that we know how far we need to stretch the unwrap and what the strength of the vectors for the unwrap we’ll need to use. All of the other variables are salt and pepper to taste and I’ll explain them as we go along.

Create a UV “rest position” map
First stop is generating an unperturbed screen space UV map which I’ll call “rest position” from here on out just to keep things simple. Here’s the deal, since we have no way of knowing where our object is in anything beyond screen space coordinates, we’ll just do our work in a normalized 2d coordinate system. Keeps it simple.
So lower left hand corner is 0,0 and upper right hand corner is 1,1. Red represents the X dimension, Green the Y. Sounds familiar right? Handily enough this is the same 0,0-1,1 space for X,Y is what we use for 2d textures on surfaces which we call UV coordinates, or UVs for short.
We’ll need our rest position map for a couple of steps. First is to figure out vectors for how to return our surface from screen space back into rest position.

Create an unwrap vector
We do this by subtracting our objects rendered UV map from the rest position we just created. This creates a vector that points in the direction required to move a pixel from it’s specific UV coordinate back to it’s rest position. That process is what people call a UV unwrap and we just created the vector required to facilitate it.

Create object based screen positions
Next, now we know the direction (vector) and amount (amplitude) every point on the surface needs to go to return itself to rest but ultimately, what we really need to know is, where are each of those pixels on our surface in screen space. Well, that’s actually really easy. We already defined our screen space, it’s the same as our rest position. For the sake of making it obvious we multiply on our object alpha over our rest position and now we have a pretty obvious idea of where our surface is in screen space. Remember we don’t know shit about the third dimension so we’re relying solely on 2d coordinates. With that, if we take stock, we have corresponding UV coordinates of every pixel on our surface in both rest position and in screen space. We know the corresponding screen space coordinate of any surface UV coordinate and lastly we can push any data available at a surface UV coordinate back to rest position using the unwrap vector we created. Now we just need to pull the thread of those corresponding pieces of information together through the loop.

Unwrap our data
First thing’s first, in order for us to do something meaningful we need to UV unwrap our surface. This will return all of the data at any given UV coordinate on our surface back to rest position. But what data are we interested in? Normally people unwrap a surface for texture data to paint on and then reapply but that’s not what we need. We’re interested in the position of a specific pixel at different frames, so that’s what we’re going to return to rest position with our unwrap: screen space position. Much like when you stabilize a region of an image to filter it temporally and then invert the stab that’s exactly what we’re going to do but with 2d positional data. We use the resulting unwrap vector we made earlier and apply it to our screen space positional data, resulting in our screen space positional data unwrapped into our rest position. Since the pixel spread node works in absolute units and not a normalized space, we need to use integer amounts based on the frame size which get multiplied by the vector amplitudes. Since the frame is not square we calculate the height’s amplitude based on its percentage of the width. The amounts of all the unwrap parameter are controlled by the variables setup we made earlier so as long as those are knocked in we should be fine. But first we need to fix some broken bits like those black corners in the image above.

Fix shit
So in the first bit of brute force we unwrap the rendered surface alpha into rest position as well and then use it with a pixel spread just to extend the edges of any shitty areas we’re missing in our unwrapped vectors. This is pretty much salt and pepper to taste but since we know we’re going to perform some temporal operations on this data later, its helps to not have a bunch of holes in it that will make super random spikes in our data. After that we need to perturb that positional data a tad.
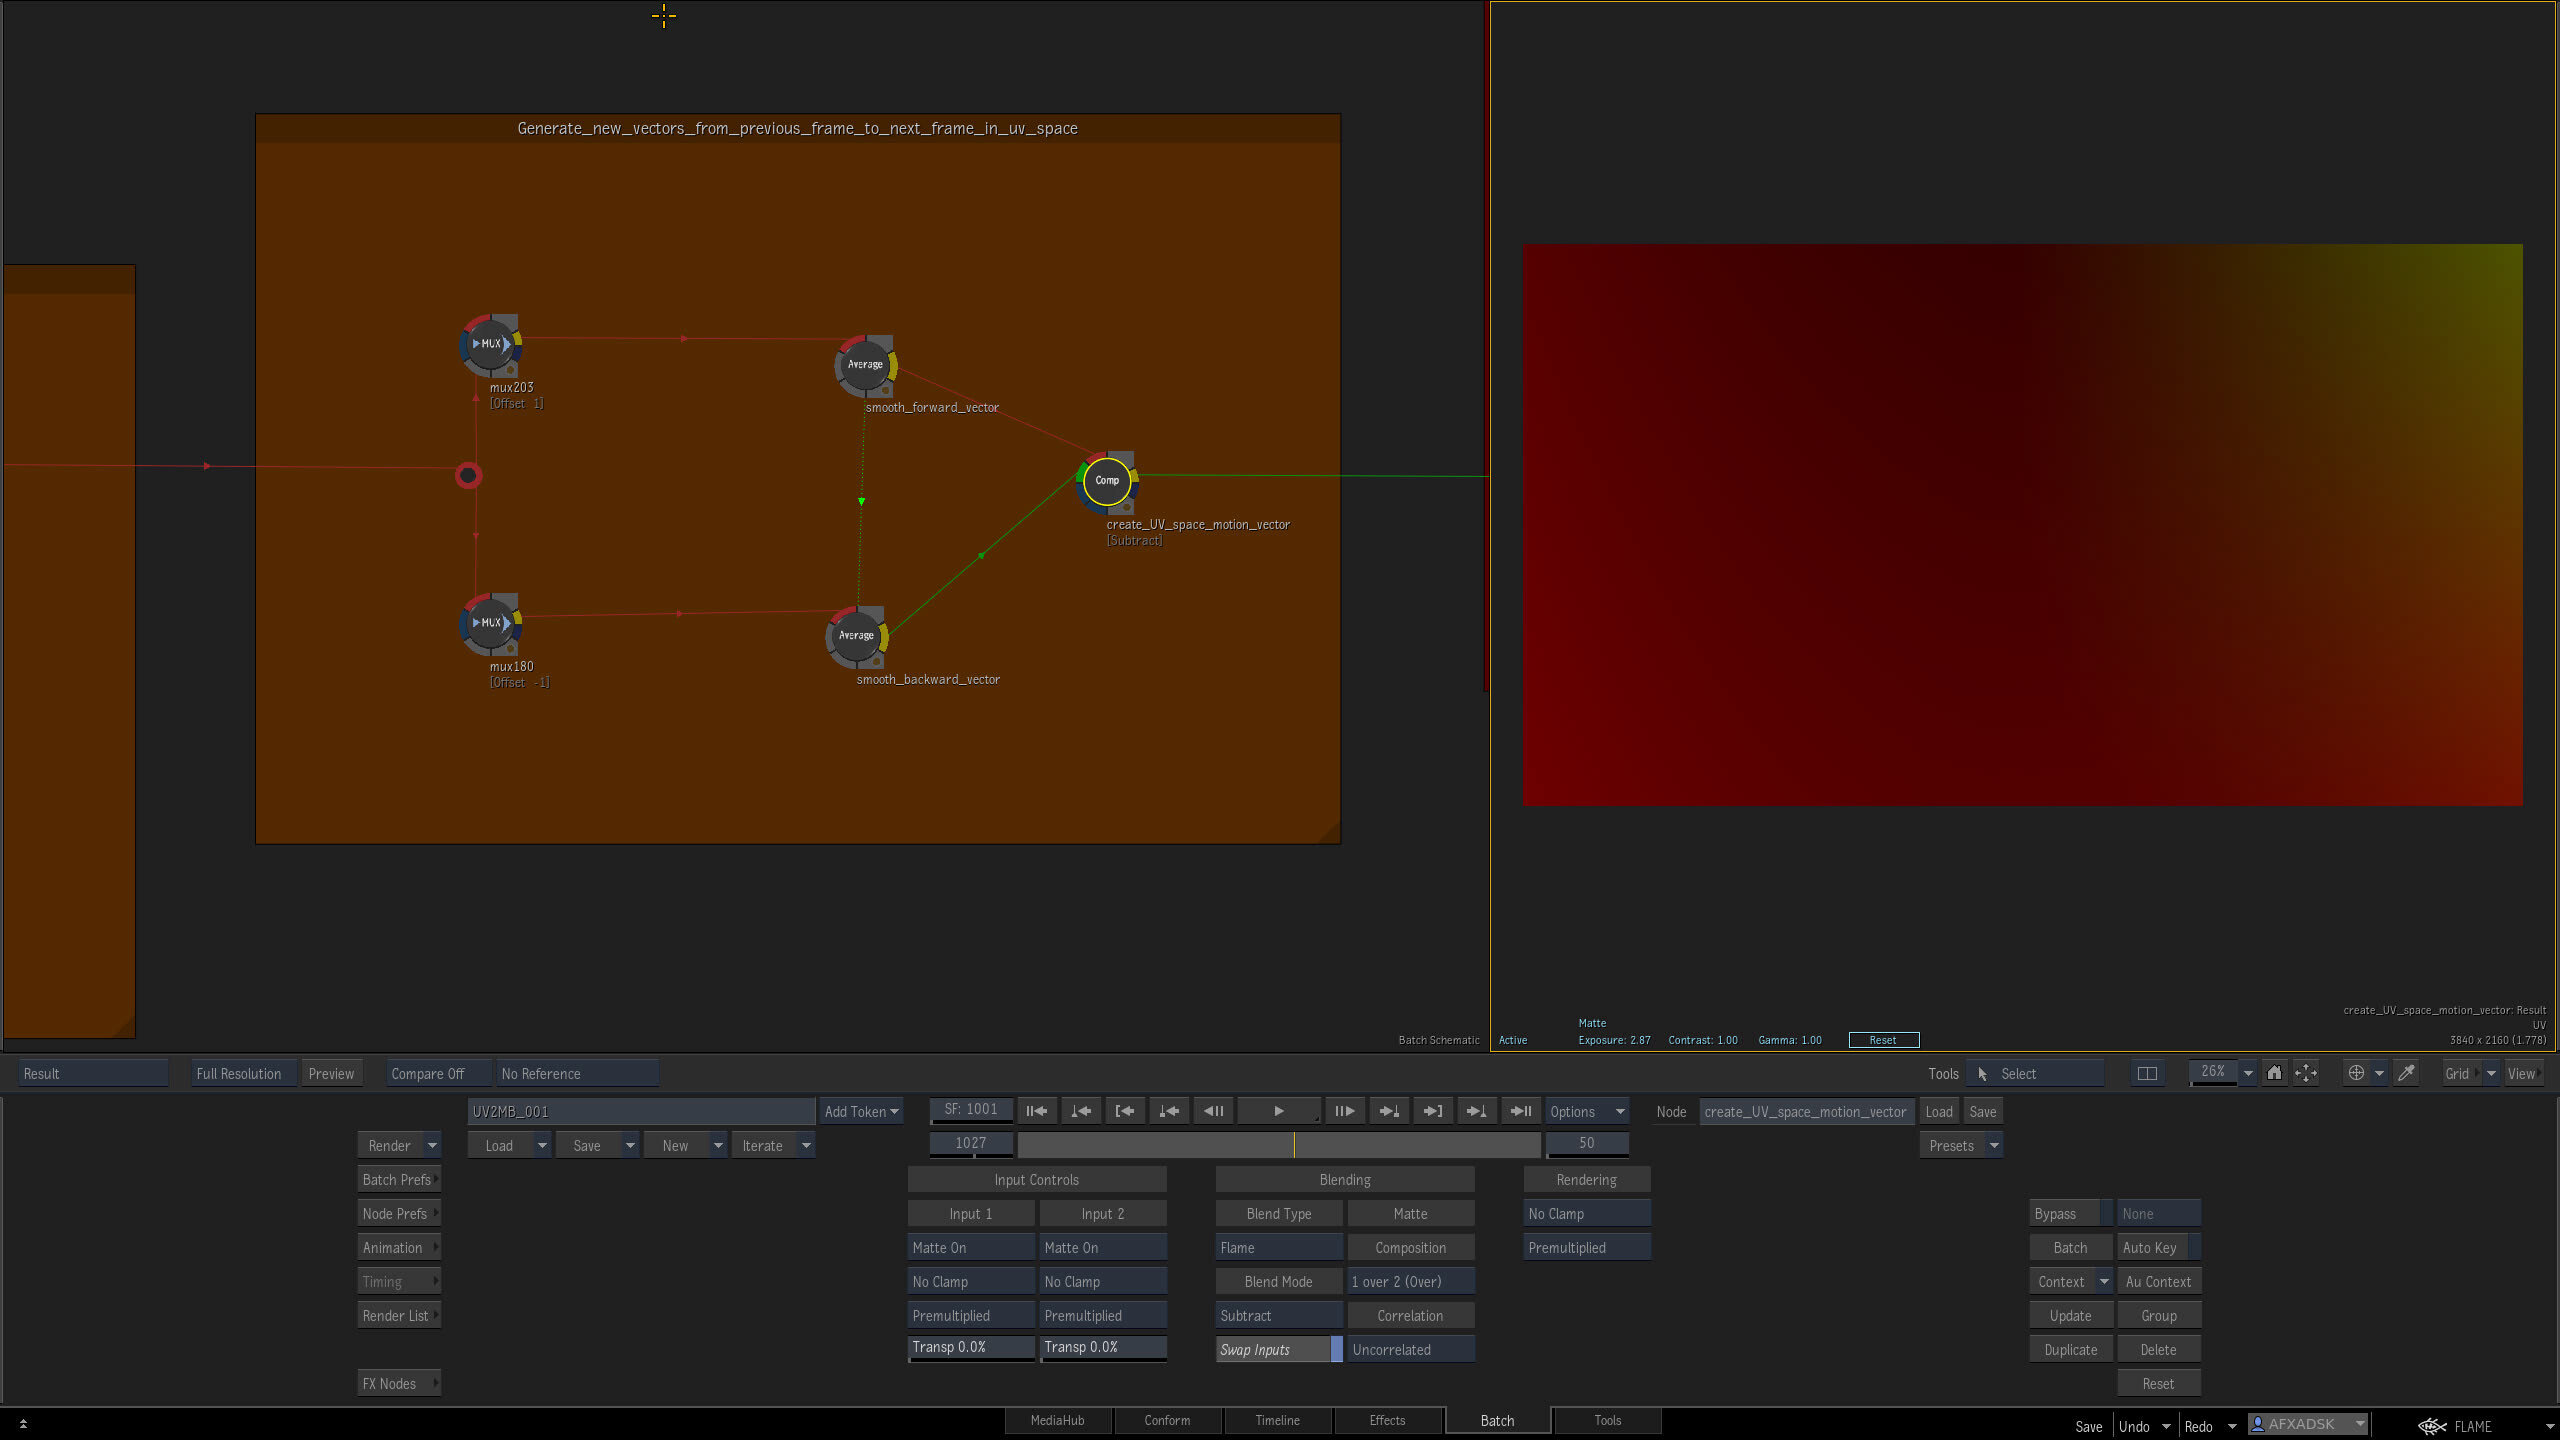
Make a motion vector
We now have a position of a pixel on our surface at a given frame but motion vectors describe the direction and amplitude that pixel is going to travel—2d’s version of vel. Remember, we’ve unwrapped our screen position into rest. That means each pixel’s red value denotes where in the screen’s X-plane it lives and every pixel’s green value determines where it lives in the screen’s Y-plane. In other words, we know where we are on this frame and next frame we’ll know where we went. So, if you think about it, really all we have to do here is subtract where we are now from where we went and then we’ll know the distance (amplitude) we traveled and the direction (vector) we traveled in. That’s easy enough, mux nodes slip our input stream of unwrapped positional data a frame forward and a frame backwards. While we’re here we’ll also average this data a little to remove any more spikes. It’s another salt and pepper to taste moment and it may not be needed but it’s in there anyway. Once that’s done we do our simple subtraction and bingo! We just created a 2d velocity vector, or what’s we call in flame, motion vectors. Now, they’re still in rest position and they’re reaaaaaallllllllyyyyyyy low amplitude since we’ve been working in a mostly normalized space, but they are there—YAY. But we’re not home yet.

Multiply the resultant vectors to make them big and strong
To begin with we need to make our new motion vectors stronger than they are. Flame is expecting screen space values that aren’t normalized, so if we push a value of 0.026315789473684 and expect a result congruent with 38 pixels worth of movement we will be disappointed. But that’s easy enough, we can just multiply it by a stupid high seemingly arbitrary value. It probably should have just been Xresolution, but I just cranked it up to give it some juice. This is, after all, more about how it feels than anything in the end result.

Then we blur…
…which is also what the next step is about. Once we multiplied the motion vectors we’re seeing some clear artifacting—but nothing a little blur can’t help. Up until now we’ve been doing al of this work in a higher resolution ultimately then we’ll land in once we go from rest position to back to screen space so it’s better to do little dirty tricks like this now.

Convert the motion vectors into screen space
The next step is to simply convert the rest position motion vectors into to screen space. We do this by applying the original rendered UV map as a UV texture in an action node with our rest position motion vectors as the diffuse. Since we’ve been messing around with our edges here and there we also take a moment to multiply our screen space motion vectors by the rendered alpha. That keep everything nice and tidy as we go on to use them, but first it’s time for a pat on the back.

We’re not far off…
We do a little comparison shopping of our home-brewed motion vectors with those coming out of flame and action and damn, we are not far off. It seems like we could have a little more blur perhaps but I didn’t feel like remaking this screenshot. So once we’re content that we’re not too far off we move on to the final step of applying the vector motion blur.

It works! Internet Data FTP FTW!
The last variables are used here and can be dialed around to your hearts content but it more or less works. I’ll be the first to say that it’s not perfect, but I do like the notion of concerting between screen space and UV (rest position) to mess with the image. I don’t know what else one might do with this technique, but I thought I might share.
Batch script is here → Dropbox - UV2MV.zip - Simplify your life